Proposal Attachments

Figure 205 Proposal Development Document > Abstracts and Attachments Page > Proposal Attachments Section - Example
Table 79 Proposal Development Document > Abstracts and Attachments Page > Proposal Attachments Section - Field Descriptions
|
Field |
Description |
|
Attachment Type |
Required. The type of proposal document to be attached
and sent (transmitted) to the sponsor. The type of proposal document to be
attached and sent (transmitted) to the sponsor. Click the down arrow
A base list of types will always be presented, including any Institutional-only types maintained by your KC Administrator to support local business practices.
|
|
Status |
Required. |
|
Uploaded By |
Display-only. The name of the individual who added the attachment. |
|
Posted Timestamp |
The exact date/time the attachment was uploaded to the system. |
|
Comments |
Type in this free-form text box to add notations
relating to a specific attachment. Use the add note feature as
necessary to expand the text area |
|
File Name |
The name of the file that has been attached appears
within the box after it has been browsed for and uploaded using the Click the open/download option that appears in your local search window to complete the action. The name of the selected file will appear in the field.
If the wrong file was selected, clicking [choose file] will reopen the browse window. |
|
Contact Name |
The name of the individual to be contacted if subsequent viewers/approvers have questions regarding the document. |
|
Email Address |
The e-mail address of the individual named in the Contact Name field. |
|
Phone Number |
The phone number of the individual named in the Contact Name field. |
|
Description |
Type a brief summary of the attachment that is being
uploaded. Use the add note feature as necessary to expand the text
area |
|
|
You must click the [add] button to complete the
action. The attachment will not be part of the proposal until it is added.
The yellow “splat” |
|
|
Click [add] to add the attachment. |
|
|
Clicking [reset] will clear all the fields, including the attachment type selected. |
|
Once the attachment has been added, the subpanel will populate with additional fields and options.
| |
|
|
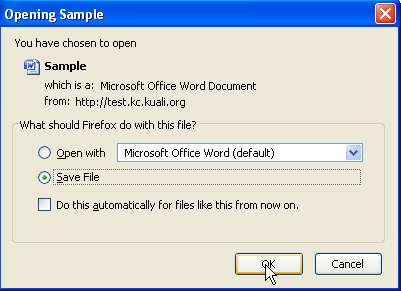
Depending on your browser’s settings, a dialog box opens prompting you to Open or Save. |
|
|
To upload a different file to this attachment type, click [replace]. The File Name field will present the [browse] button to locate a replacement file. |
|
|
Clicking [delete] will delete the attachment |
|
|
Click to see or modify the rights users have for a particular proposal or internal attachment. The window displays those individuals who have already been assigned [any] role within the Permissions page. Special rights can be given or removed for documents within the proposal and internal attachments sections through this function. Rights include read, modify, and none (which removes the ability to view/edit a particular document, regardless of the role assigned on the Permissions page). |
Viewing Added Attachment Files
Use the following procedure when you want to view documents that have already been attached to the e-doc.
 To view attached files:
1. Click the view button.

Depending on your browser’s settings, a dialog box opens prompting you to Open or Save.

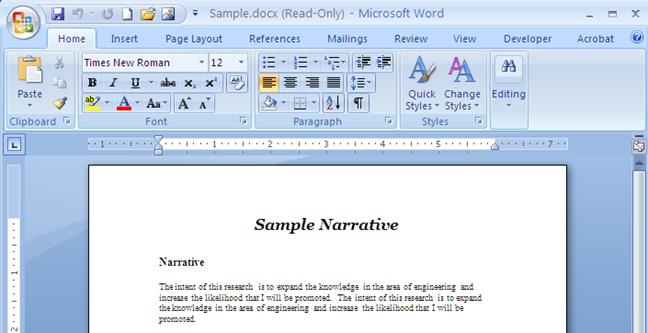
2. Save to your local drive, then double-click to open. The associated document viewing application launches (for example, Microsoft Word, or Adobe Acrobat).

 View/Edit Rights
1. Click the view/edit rights button.

A Rights section appears in a new browser window (pop-up screen).

View and/or edit the rights as desired, then click the
close [X] icon to close the popup window and return. Select the radio
button by clicking
within a circle to place a dot within it to indicate your selection of the
desired option.

 to display the list and
click on an item in the list to highlight and select it to populate the
box with your selection.

 Select ‘Incomplete’ or ‘Complete’ from
the list to specify the status of the document as assigned by the
user.
 .
. [Browse] button.

 beside the button is a visual
reminder to click the add button.


